Fiddlesticks from League of Legends
This blog displays my weekly progress working on the character Fiddlesticks from League of Legends as a Master Crafter in Arda Wigs' Event "Winter Weekly Work in Progress".
1/7/2018
1/7/2018
Week One: Mapping Out Limbs
|
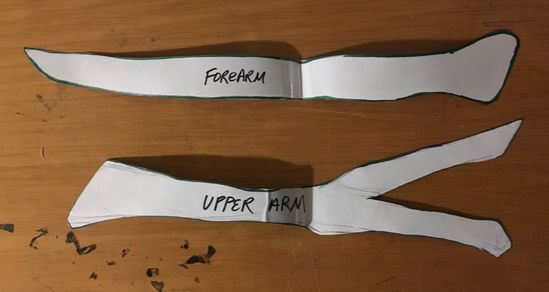
Step One:
The first thing you need to do is create a pattern that you would like to carve out of foam. The more specific you can be with the measurements, including thickness and such, the more helpful the pattern can be. Then, cut the pattern out of the paper and LABEL IT! |
|
|
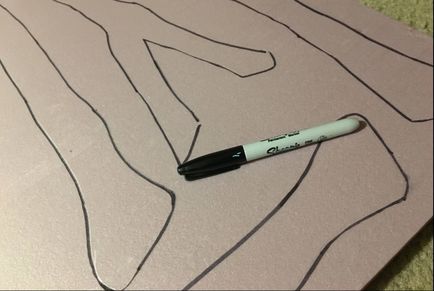
Step Two:
Trace the pattern pieces onto the foam with a marker that you can easily see. I prefer marker because it gives me a bit more leeway when cutting out the shape. I prefer to leave at least a 1⁄2”gap between pattern pieces in order to prevent any cutting mishaps that could happen. |
|
|
Step Three:
Stack as many pieces of foam necessary for the thickness of your project (the foam is 1” thick), then glue them together. DO NOT USE Hot Glue, any type of gluing Cement, or foam-melting adhesive. USE Elmer’s Glue, Modge Podge, or Wood Glue (Optional): Use clamps to keep the pieces of foam together - otherwise just use heavy objects. |

|
|
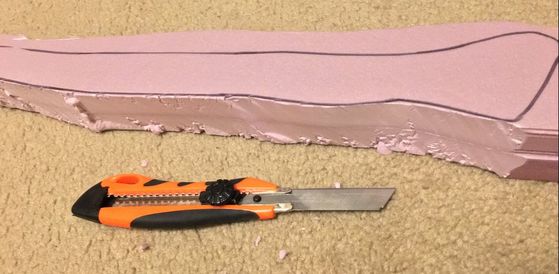
Step Four:
Once the glue has dried (24 hours is safest), carve as close as possible to your pattern lines without cutting into the shape. Try to cut in a vertical direction. (Optional): A scroll saw will make this step 100% easier |
|
|
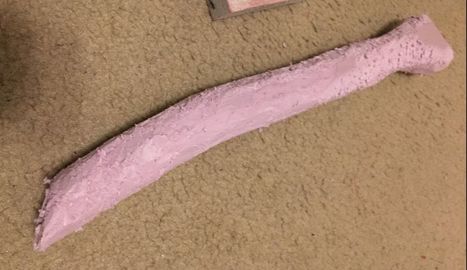
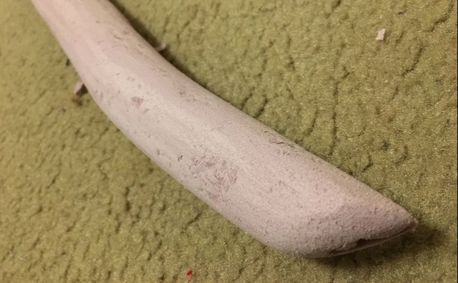
Step Five:
When your piece is completely carved out of the pink insulation foam block, you can start cutting into the foam. Shave off small chunks at a time in order to get the correct curves and roundedness wanted. Pro Tip: If the X-acto Knife is getting dull, dipping it in Coconut Oil and/or sharpening the blade will help make the shaving and carving process easier. |
|
|
Step Six:
Because your dull knife is the worst, you will have to sand the Pink Foam smooth. This is a simple relaxing process that can be done with a sandpaper - just beware of all the dust! THEN YOU’RE DONE! |
|
|
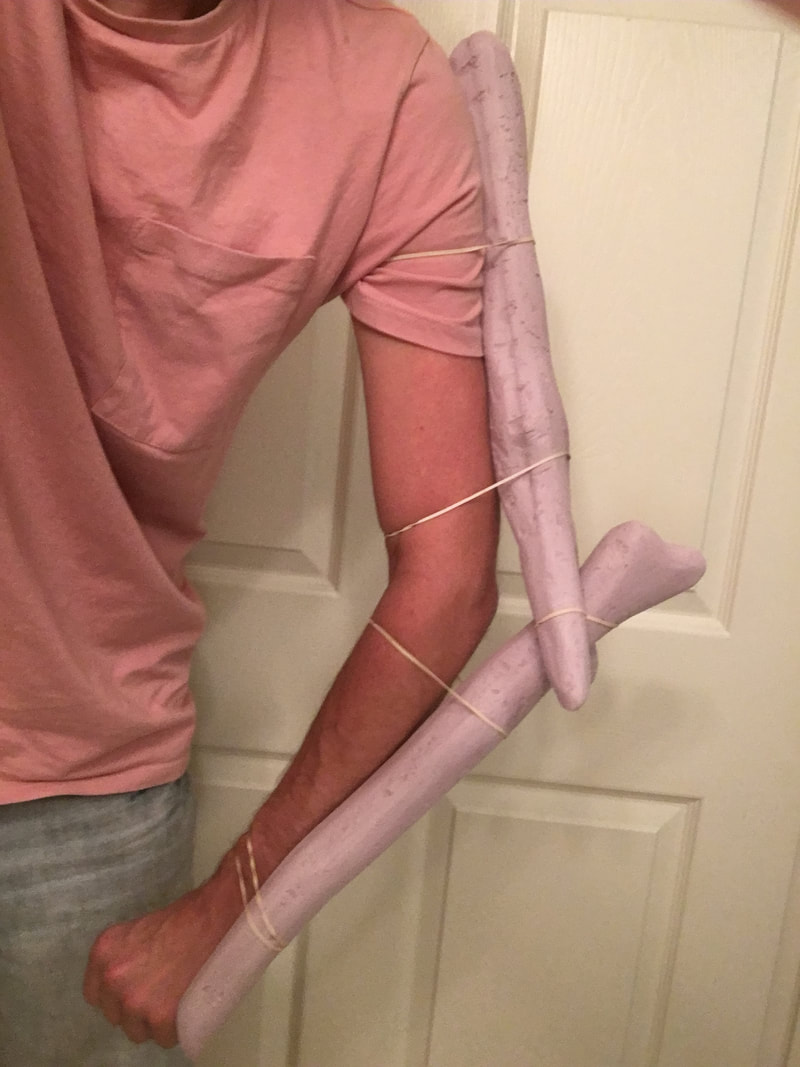
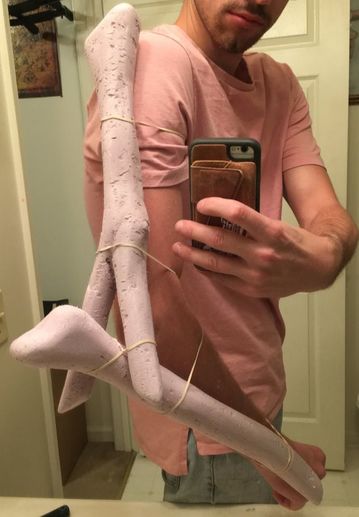
Project:
My plan in order to recreate FiddleSticks’ stick-limbs is to create an outer-skeleton out of Pink Foam and Thibra. I plan to wear all black clothes, and the skeleton will functionally bend with my joints in order to create an illusion or a sense of puppetry. |
|
|
Week Two: Sewing Week
|
Step One: Patterning
This garment Fiddlesticks wears is neither a shirt nor a dress! Therefore, it’s a shirt-dress! So, it can be patterned sort of like a really long shirt without sleeves. However, there are a few things to keep in mind while creating the pattern:
|
|


|
Step Two: Cutting the Patterns
The texture for this garment looks like a loose weave fabric that is made of thick fibers (determined by the way the end of the garment is draping over the thighs). I chose Burlap as my fabric for this character because it has the same properties as stated previously and can easily be dyed and altered. Things to keep in mind:
|
|


|
Step Three: Assembling
For the shirt-dress, the seams that will be sewn together are the sides and the shoulders. Six inches down each side of the neckline will be sewn as a double-baste and be gathered down to three inches (both of the Muslin and the Burlap). Once you know your mock-up fits properly, you can place it inside the Burlap shirt-dress as the lining. For the petticoat, fold down an inch from the top and sew with a ⅝” seam allowance in order for a ½” elastic waistband to fit inside. Weave in the piece of elastic that is ¾ the size of your waist measurement and sew down the ends. Pro-Tip: Fray-Checked all the seams (for all the garments and linings) to make sure nothing unraveled. *this is important with the Burlap* |
|


|
Step Four: Lacing
The petticoat fit perfectly! However, the shirt-dress did not give the best silhouette due to the thickness of the burlap… I look like a potato sack…. To fix this, I decided to add some lacing to the back of the garment. I figured lacing would tie nicely into the “stitching” and “patchy” type theme that Fiddlesticks has. So, I added 22 button holes into the center-back of the garment that ended at the hips. As a result, it did help the silhouette of the garment; however, it still wasn’t enough, and I ended up adding 12 button holes onto each side of the garment (arm-scythe to hips). 46 buttonholes total. |
|


|
Step Five: Corset?
To make sure I had the correct silhouette I wanted, I took pictures with and without a corset to see which gave proportions that are more true to the character. I threw on some rope and a red scarf to help me imagine the character more. In the end, I think the corseted version works the best (left). The basic shape of this garment did take me a bit to perfect, so I still need to dye the garment dark green and add some patches, stitches, and cuts for details. Overall, I am pretty happy with the result shape, and cannot wait to see how the extra room in the shoulder area interacts with the shoulder pads. |
|


Week Three: Glove Week
|
Step One: Creating the Under-structure Pattern
This first thing I did when creating Fiddlesticks’ hands to create a pattern. I know I wanted to elongate the fingers and make them lanky and creepy, just like Fiddlesticks. I did this by tracing my hand on a piece of paper, with a common wool glove on, and locate all of the joints with dotted lines. After that, I mapped out all the sections and joints of the hands, and drew different shapes depending on what I felt I needed for the shape and silhouette of the hand. Make sure to always label each shape, so they do not get mixed up with other pattern pieces that you are working with! |
|


|
Step Two: Cutting Pink Foam
In this next step, I cut out the pattern pieces from the paper, traced them onto pink insulation foam, and then cut the shapes out from the pink foam. After that, I rounded out all of the pink foam pieces with a box cutter in order to make them appear more as knuckles and less like boxes. Then, I used Super Glue and Hot Glue to attach the foam to the Wool Glove. There are two things I needed to be careful with here. One, I needed to make sure I used a type of glue that was compatible with foam - something that would not melt or destroy it. Two, I needed to wear 2 pairs of latex gloves underneath the wool glove to protect my fingers during the gluing process. |
|


|
Step Three: Creating the Glove Pattern
For this step, I just created a pattern for the glove by tracing my hand again, but this time I was wearing the glove with pink foam attached to it. I had planned on hand-stitching the entire glove, so I left a quarter inch of wiggle room just in case I needed it. I then cut the pattern from the paper, and transferred it onto both Burlap and Muslin fabrics. I chose to use two layers of fabric for the gloves because, through a couple of fabric samples, I found the Burlap to be slightly transparent (due to the loose weave) as well as extremely finicky when sewn. I eventually found out that the pink foam made the glove too thick for the pattern; therefore, I had to cut a 1.5 inch strip of both Burlap and Muslin that was sewn between the two layers. (To picture this shape correctly, imagine this glove as being like a 3D box. Here, the hand shapes of the pattern are the faces (the ceiling and floor) of the box and the extra strip acts as the walls that connects the ceiling and the floor |
|


|
Step Four: Sewing the Pieces Together
This step is pretty self-explanatory - I just hand-sewed all of the cut pieces together with a whip stitch. Make sure you sew Inside-Out because you will flip the glove inside out to reveal what the glove actually looks like (This process is called “Bagging”). I found out afterwards, that it would be beneficial to surge, zig-zag stitch, or even fray-check all of the edges of the fabric to prevent them from fraying… ….this mess was my result…. The burlap was fraying…. This was the result of my glove after I had turned it inside out - frayed edges - a complete mess. However, instead of panicking, I quickly fray-checked all my edges, and stitched them all back to the glove. With some love, care, and patience I was able to fix it! However, I definitely learned my lesson with Burlap, and will be paying extra attention next time. Once the glove was all fixed, I then placed the Wool Glove with Pink Foam (the understructure) inside of the Burlap Glove, and here it the result: |
|


|
Step Five: Knuckles
Looking at my reference photos, I found that Fiddlesticks has these gnarly looking knuckles protruding from his hand, so I needed to figure out a way to create those. I figured I could just use some Pink Foam, cover it with Muslin and Burlap, and sew it onto the glove… and so I did. After I glued on the Muslin and Burlap fabrics, I just had to place them into the correct position on the glove, and sew them into place. This turned out really well and gave more dimension to the glove overall. |
|


|
Step Six: The Jutting Fabric
I am not too sure what to call this part of the glove, but it is where the fabric shoots out of his wrist, and looks all frayed and such. But, that is what this step will be about, and I am starting with Rectangular pieces of Muslin and Burlap that measure triple the circumference of my wrist. Then, at one of the longer ends of the rectangle, I started to do a running-stitch all the way to the other side. This is a basic stitch that consists of going over and under, and will eventually let me create gathering. Once that was completed, I pulled the thread, resulting in a gathered piece of fabric. I needed to pull the thread tight enough to create enough gathering, but at the same time, the hole had to be large enough to fit my wrist through. When that was just right, all I had to do was attached it to the rest of my glove with some stitching and a little Super Glue for extra support! |
|


|
Step Seven: Final Touches
In this last step, all I needed to do was add the rope that is around Fiddlesticks’ hand and give the glove some additional texture to give more of the feel of Fiddlesticks. This was super simple actually, all I did was Hot Glue some ¼ inch Manila Rope around the glove. Lastly, to add texture, I sponged Liquid Latex (Lt. Beige Color) over the entire hand to give more color and dimension. …. and voila!... The Construction for Fiddlesticks’ Gloves are Complete! |
|


Week Four: Mask Week
|
|
|
|
