Costume Blog | Him, Powerpuff Girls
Learning Make-Up | Basic Foam Techniques | Costume Tips
7/26/2017
7/26/2017
Section One | Learning Make-Up
|
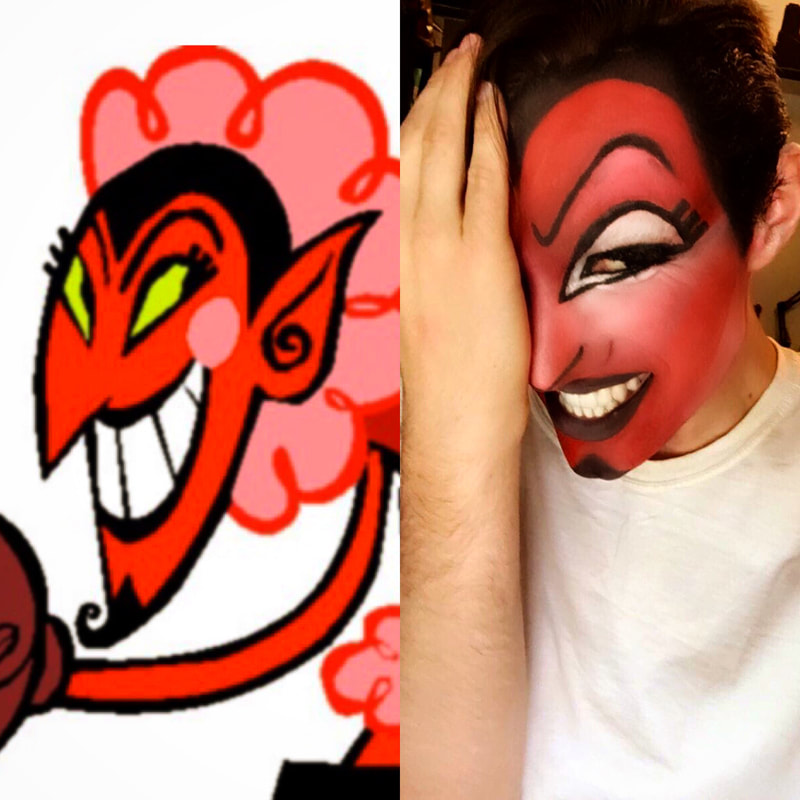
Make-Up Trial #1
When I first chose this costume to create, I looked into other cosplayers who have done the same character. Every single person seemed to take a realistic approach to the character (i.e. using cotton or tulle for the pink fluff in the costume). I wanted to take a different approach with the character in general and take a more graphic route. With that being said, in this first make-up I tried to create the same eye shape from the cartoon onto my eye. I was trying to follow it as exactly as I could - even down to the three eyelashes. In the end, I don't think that this makeup works very well for the character, and I highly doubt it would read well in pictures. However, I do enjoy the arch of the eyebrows! Here are a list of things that I learned and critiqued myself on: - My brow bones are VERY prominent, so this graphic eye may not work. - Using white to create high points on the face can possibly distract from the rest of the face if it is too strong. - Figure out a way to make the nose more pointed. - Eyebrow covers are HARD. |
|
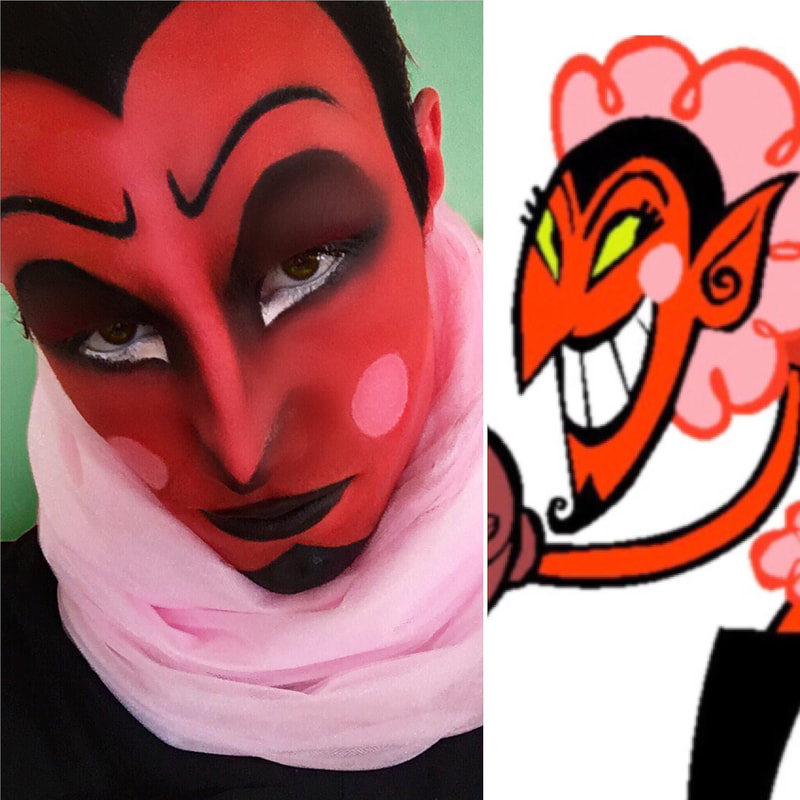
Make-Up Trial #2
For my second attempt at painting my face, I took inspiration from Phi Phi O'Hara's cosplay of HIM. She created a larger eye by playing with the natural lines in the eyes instead of drawing on the cartoon ones. I think this design is better than the one before; however, it is still not what I was looking for. The eyes still need to be opened up more - or at least not to dark above the eye. I started to apply some of my learned knowledge from the previous make-up trial. I used less white as a highlight on the face, and decided to focus the brightness on the nose to create the large, pointed nose illusion. I also focused some white under the eyes in hopes of opening them up a bit as well as keeping a graphic touch to the design. Lastly, I remembered to put on the pink dots! How did I forget those! Here are a list of things that I learned and critiqued myself on: - Having more of an arch to the brow stays truer to the character. - Use white sparingly, because the things that are lighter will be more prominent in comparison. - The pointed end of the nose ended up working well when feathered out with black eye-shadow. - Wear contacts even when rehearsing the make-up. |

|
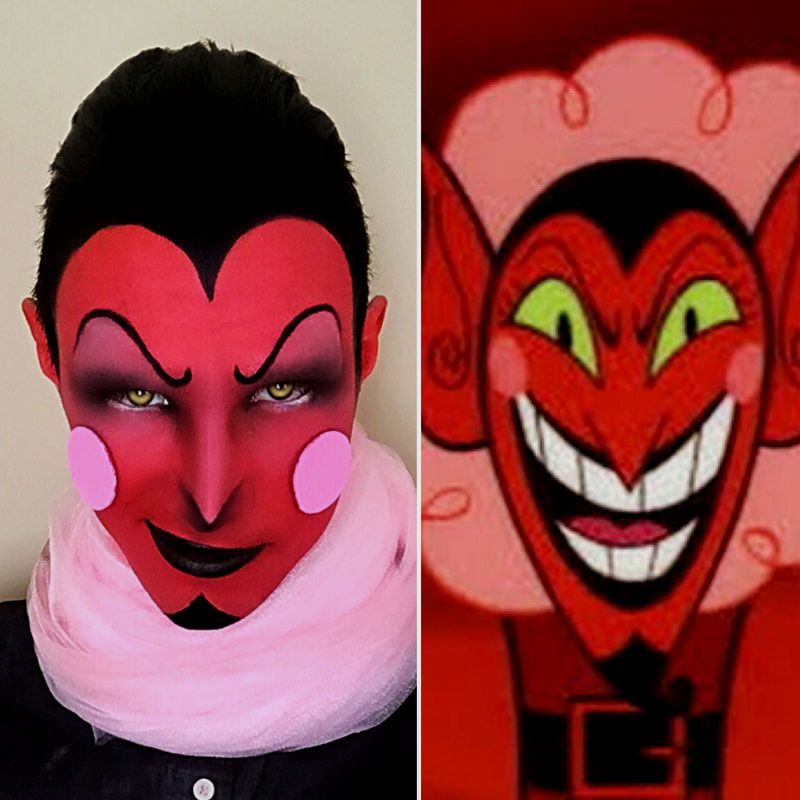
Make-Up Trial #3
Oh. My. Goodness. I don't even want to talk about how bad this one is. However, there is always something to be learned from mistakes! My idea was to try and go back to the graphic look to see if I could re-work the design by shifting the tilt of the eyes.. In the end, I realized that the graphic look was not going to happen - at least without prosthetics it wouldn't, but I am not ready for that. On a brighter note, by doing make-up so many times I do think my application and precision is getting a bit better. I really enjoy the way I was able to carve out a bit more of my cheek bone in this makeup, as well as using the white as a bit of a highlight. (Speaking of which, I need to buy some highlighter. Maybe it will help with the dimension of this makeup in the future). Here are a list of things that I learned and critiqued myself on: - Do not use so much black eye-shadow around your contours - especially the nose. It will be too intense. - These eyebrow arches are still too shallow: they need to be very arched. - The graphic eye look is not going to work. - Over-lining the lips may be helpful if done correctly! (sort of a "Joker" smile). |
|
Make-Up Trial #4
SO. MUCH. BETTER! In this make-up trial, I wanted to go for something simpler that translated onto a human face rather than trying to paint new features onto my face. In my head, I did not think this makeup was going to work at first. I was planning to create a graphic style with this character, and I was afraid this was too simple. However, I added some pink cheeks made of craft foam as well as a beard made of craft foam (that will be shown in the final pictures) in order to tie the graphic feel back into the makeup. Some of the major points that I enjoy with this makeup are the eyebrows and the nose. I was able to practice the shading on the tip of the nose enough times to where it looks good and I can replicate it. With the eyebrows, I tried to go big, arched, and long in order to achieve the spooky HIM feel. I think the key is to start where your natural eyebrows start and go from there. Here are a list of things that I learned and critiqued myself on: - A little bit of white in the waterline brings attention to the eyes. - Sometimes you don't need to have complicated make-up to be effective - Wearing contacts with make-up trials is important! - THIS MAKEUP IS SO MUCH QUICKER TO DO COMPARED TO THE OTHERS! |
|
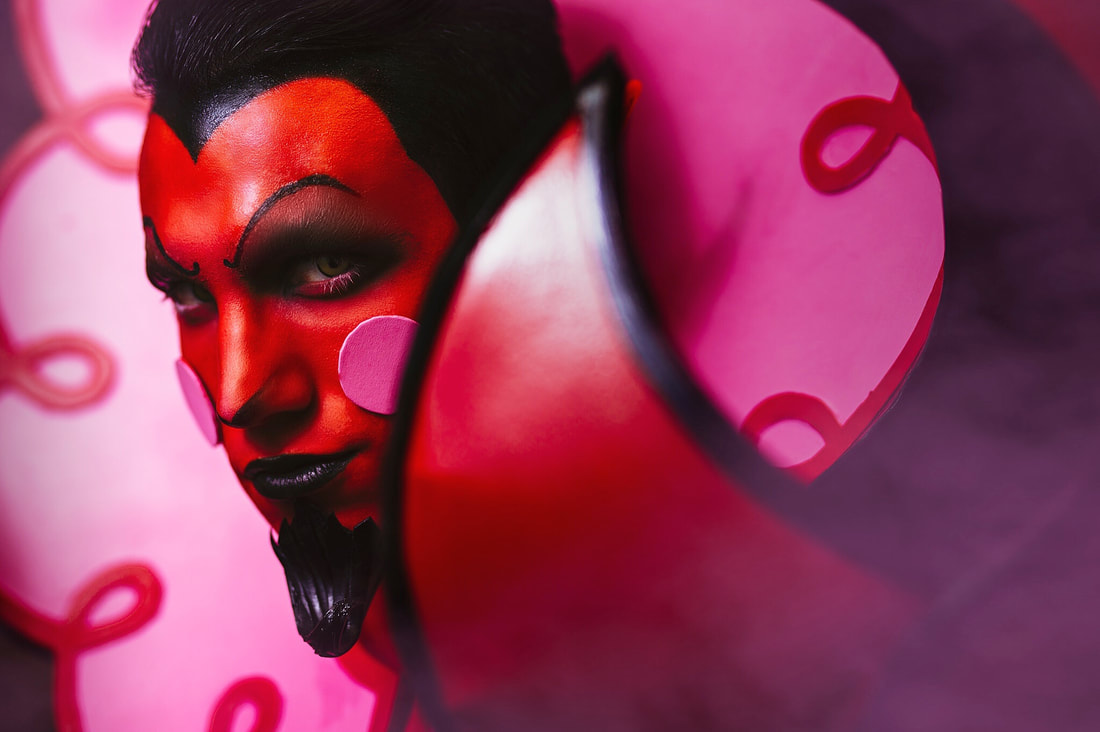
Final Make-Up
This wonderful picture by @Kevinertia displays the final face I painted at Otakon 2017. I had a BLAST at the convention and loved meeting tons of new people! Meeting new people and getting to talk to them is one of my FAVORITE things about conventions. Anyway, back to make-up talk! Even though this was the final look for the convention, there are always things to learn for the future! This was my second time wearing a full-face of makeup to a convention: the first was Ryuk at Katsucon 2017. Katsucon is in February when the temperatures are much cooler and I didn't have to worry about sweating at all. However, wearing makeup in the summer time, without sweating it all off, is actually one of the most difficult things in the world. If you haven't gotten much from this blog yet, I at least want you to know that you should use plenty of setting spray when applying your makeup AND bring a makeup sponge with you to the convention to blot any sweat away. Learn from my mistakes, because I was a MESS by the end of the day! Here are a list of things that I learned and critiqued myself on: - Even if your character is not a girl, wearing false eyelashes is important for photos! - Don't be too scared to contour with white - I think I got worried I would add too much white that I ended up not using enough. (This applies when you are trying to paint yourself crazy colors. Not so much with skin colors). - Don't be scared to go crazy with eyebrows - they can make or break a face. I think mine could've been longer. |
